How to net boot Raspberry Pi OS from Windows
Copyright © 2019-2021 Herbert Hanewinkel, Neuried
|
||
updated March 2021 |
Remote booting Raspberry Pi OS from Windows
The setup assumes the following addresses. Adapt to your own numbers:
Windows IP address (Server): 192.168.1.10
Router/Gateway IP address: 192.168.1.73
DNS Server IP address: 192.168.1.73
RPi IP address (Client): 192.168.1.12
On Windows:
In haneWIN NFS Server (1.2.58 and higher)
- Create a folder e.g. "c:\server\raspios".
- Create a sub folder, "boot"
- Download a zipped Raspbian image, e.g. 2020-12-02-raspios-buster-armhf-lite.zip
- Use 7zip to extract the SD image.
- Use 7zip to open the SD image and extract "0.fat".
- Use 7zip to open "0.fat" and extract the whole contents to folder "boot".
- In file "cmdline.txt" in folder "boot" from the line
- Remove root=...
- Remove rootfstype=ext4
- Remove fsck.repair=yes
- Remove init=/usr/lib/raspi-config/init_resize.sh
- Add root=/dev/nfs nfsroot=192.168.1.10:/server/raspios,vers=3 rw ip=dhcp
- Select under Preferences-Server the option "Save attributes/uid/gid on NTFS volumes".
- Create a NFS server exports entry:
c:\server -name:server -alldirs -i32 -maproot:0:0
What the options do:
- name the exported filesystem raspios for clients
- allow mount of subfolders
- some raspiberry software for desktop and audio fails with 64 bit inodes, there reduce inodes numbers to 32 bits.
- map linux user root to root for file access
7zip can open "1.img" but it is in ext format and 7z does not handle symbolic links on extraction. We need the contents of "1.img" in the correct format for the NFS server:
- Boot the RPi with libreelec and login with ssh (setup description on previous page)
- Create two directories /var/raspios and /var/nfs
- mount -t nfs 192.168.1.10:/server/raspios /var/raspios
now we can access the image "1.img" in libreelec.- Bind the image to a device:
losetup /dev/loop1 /var/raspios/1.img- Mount the device:
mount /dev/loop1 /var/nfs
now we can access the contents of the image "1.img" in libreelec- cp -a /var/nfs /var/raspios
(could take an hour depending on the downloaded Raspberry Pi OS release. libreelec has no rsync and cp -a worked fine)- Clean up:
umount /var/raspios and umount /var/nfs
rmdir /var/raspios and rmdir /var/nfs
In haneWIN DHCP Server
- Create a new DHCP server profile with name "raspios" for clients with static IP addresses.
- Configure the profile
- Set Gateway IP address
- On tab "DNS" set DNS server IP address
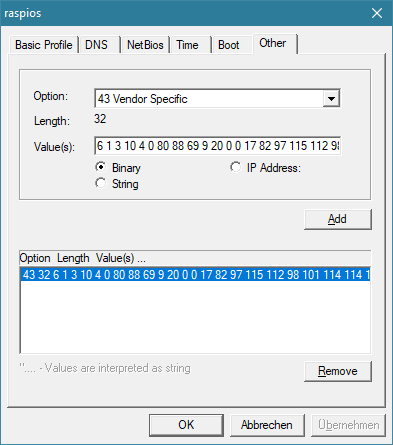
- On tab "Other" select option "43 Vendor specific" and
- Add values: 6 1 3 10 4 0 80 88 69 9 20 0 0 17 82 97 115 112 98 101 114 114 121 32 80 105 32 66 111 111 116 255
- It consists of the following parts:
- tag 6 len 1 value 3
- tag 10 len 4 value 0 PXE
- tag 9 len 20 value 0 0 17 Raspberry 32 Pi 32 Boot
- tag 255
- The calculated length value should be 32 bytes.
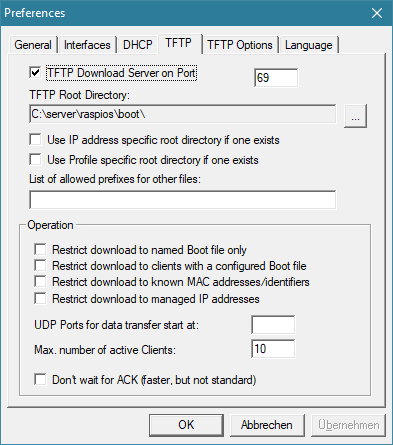
- In Preferences-TFTP set the TFTP Root Directory to: c:\server\raspios\boot
Power on the RPi.
- The DHCP server should log a DHCP discover from a new device, e.g.
DHCP Discov. b8:27:eb:9e:75:f0 (0.0.0.0) vc "PXEClient:Arch:00000:UNDI:002001" if 192.168.1.4
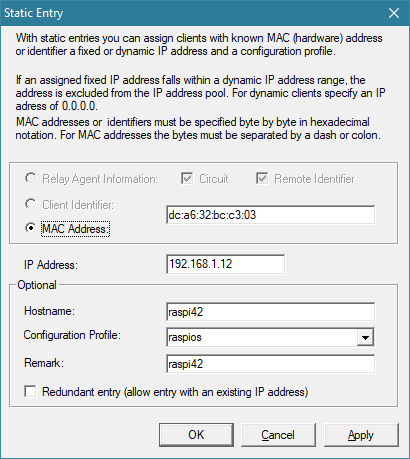
- A matching entry should appear in the list of unknown clients. Move the entry to the list of static clients and assign it ip address 192.168.1.12 and the created profile.
- Restart the RPi. Now it should boot Raspberry Pi OS from the net.
That's it. Have fun.
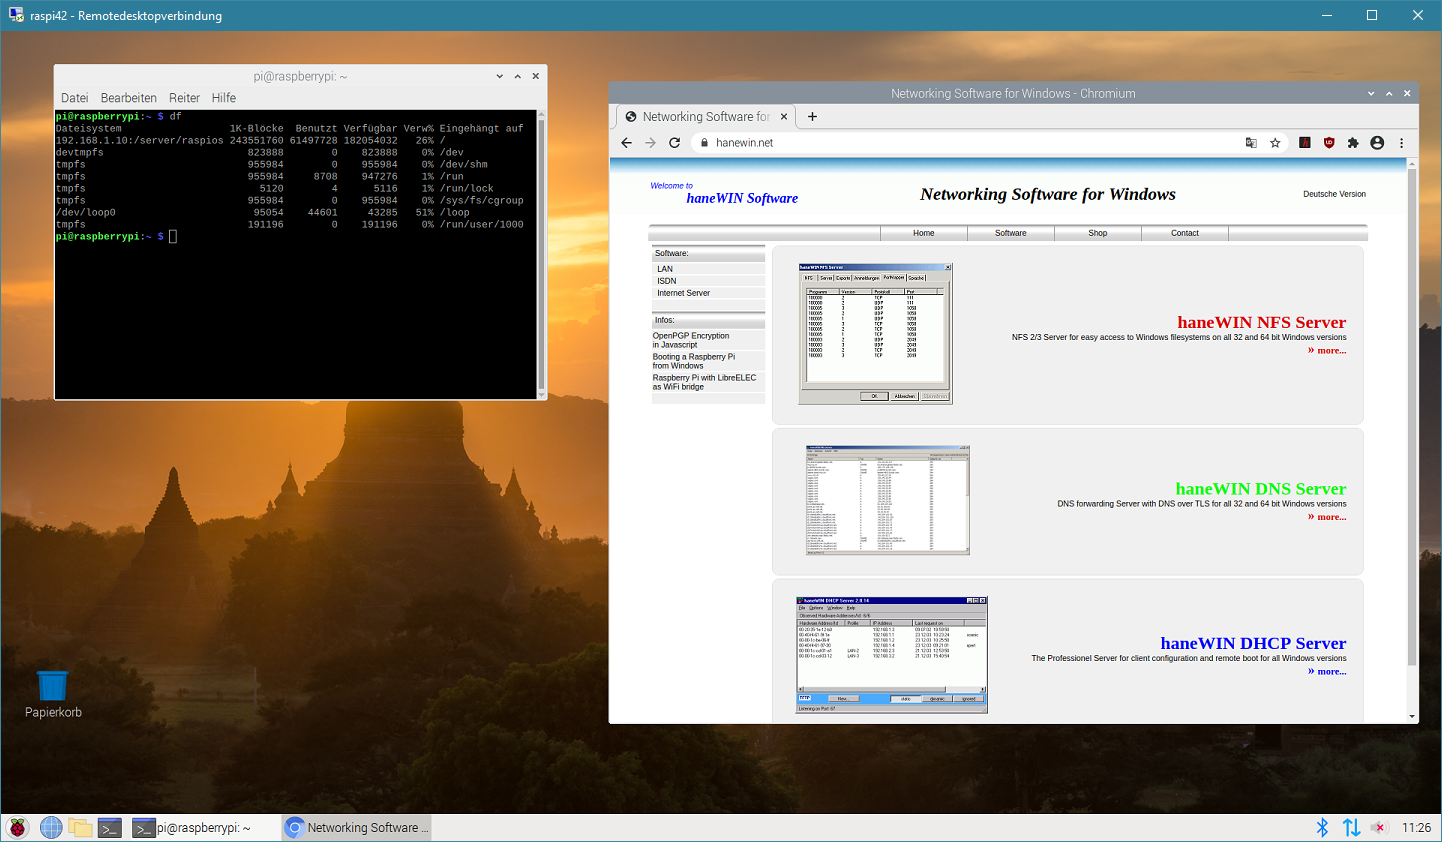
After installing XFreeRDP2 you can access your "diskless" Raspberry Pi using Windows Remote Desktop.
If you don't see any fonts on your desktop, please make sure you have enabled the -i32 option in exports.Further hints:
For a new configuration
If you want to clone/save/copy on Windows the whole Raspberry Pi OS directory tree without losing unix attributes you can do it with "robocopy". e.g.
robocopy /r:0 /mir /it /dcopy:t /sl raspios raspios2
If you want to manage more than one configuration without changing TFTP configuration
- create a folder c:\server\boot
- in Preferences-TFTP set the TFTP Root Directory to:
and select the option "Use profile specific root directory if one exists"
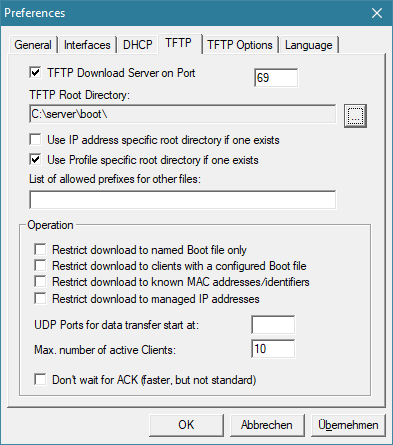
c:\server\boot
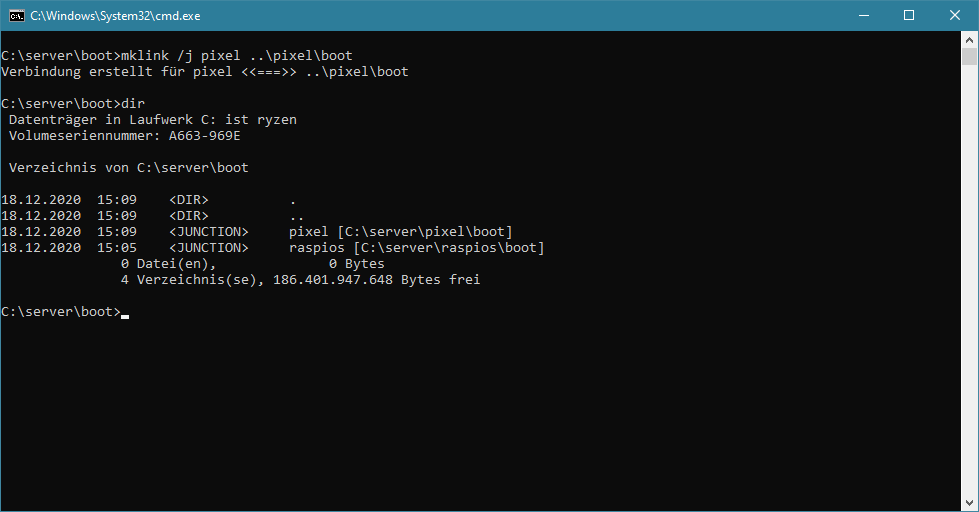
- in folder c:\server\boot create a symbolic link
mklink /j raspios ..\raspios\boot
- add a link to subfolder boot of the new configuration
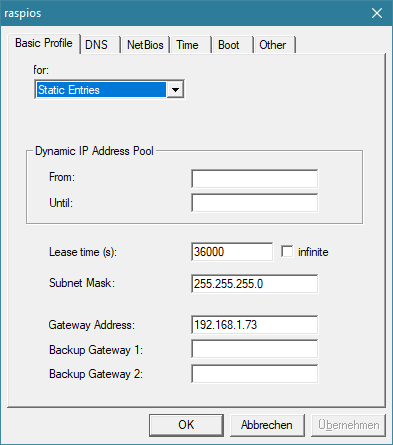
- add a DHCP server profile for the new client
- copy the whole OS
robocopy /r:0 /mir /it /dcopy:t /sl raspios <your-profile-name>
- edit c:\server\<your-profile-name>\boot\cmdline.txt to point nfsroot to the new folder
www.haneWIN.net | Home |